Thursday, October 29, 2015

Not so put together

Sometimes I wake up in the morning feeling like...eh, I don't really feel like putting the effort in today. I know you know those days too. But, you still want to walk out the door feeling confident and presentable, right? On those days, I go for messy hair, comfortable clothes, sneakers, and find some way to spruce it up and make it look good.

The look

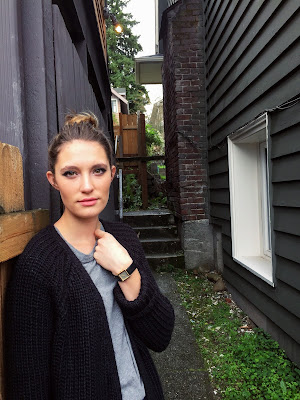
Since it's finally getting to be sweater weather, I couldn't deny my urge to wear my big, boxy, rib-knit cardigan. I got this sweater forever ago when it was on clearance for dirt cheap, and I regret to tell you that they got it back in stock and it's way too expensive now, I'll link something similar for cheaper below! For this look I also wanted a pair of jeans that weren't too tight or uncomfortable, so I went for my perfect fall jeans from Madewell. I love the look of boyfriend jeans, but the style never seems to suit me, so I like substituting jeans that are form-fitting on my waist, butt, and thighs, and a little looser from the knee down, these jeans are exactly that. Madewell is definitely more spendy, but watch for sales and they have great ones! I got these jeans for like $40, and they usually run over $120. Since I wanted to keep this look dark with neutrals, I went with a dark grey tee from Old Navy ($10!), it's super comfy, and easy to tuck into my jeans.


Jeans // Madewell
Tee // Old Navy

The Hair

Since I wanted to throw my hair up, I went with a messy bun. This hairstyle is so great for when you have greasy hair and no time to wash it. Just spray in a little dry shampoo to get rid of some of the oil, toussle up your hair with some texturizing or shaping spray, throw it up, toussle one more time and you're good to go!

Hairspray // Paul Mitchell

The makeup

I don't usually like to make my eyes dark or smoky because it tends to make my dark under-eyes look even darker, my skin paler, and my whole face a little ghostly. But, since I was going for a dark and easy look, I decided to go for an easy eyeliner trick. Here is a little time-lapse video (turn on your volume for music!) so you can see my routine, with the steps and products listed out below!

Foundation 'beige 300' // Mary Kay
Corrector 'light bisque' // Bobbi Brown
Concealer 'beige 1' // Mary Kay
Highlighting pen 'beige 1' // Mary Kay
Beautyblender 'original' // Beautyblender
Pressed powder 'dark plus' // MAC
Bronzing powder 'refined golden' // MAC
Mineral blush 'dainty' // MAC
Eyeshadow palette 'revealed 2' // Coastal Scents
Eye pencil 'ebony' // MAC
Mascara 'xtension plus' // Marcelle

The steps:

1. Apply foundation with beautyblender
2. Apply corrector to under-eyes with fingers
3. Apply concealer under eyes and on spots with beautyblender
4. Apply highlighter to cupid's bow, below lip, center of nose, center of forehead, and upper cheekbone
5. Blend highlighter liquid with beautyblender
6. Apply pressed powder as a contour to hollows of cheeks, under jawline, on hairline, and sides of nose
7. Apply bronzer over contouring, along with places you would be sun-kissed in summer
8. Apply blush to apples of the cheeks
9. Apply shimmering highlighting powder over highlight areas
10. Apply matte white / cream powder under eyebrows as highlight
11. Apply black eye pencil in wing shape to eyelids*
12. Smudge pencil with fingers
12. Apply more pencil where needed
13. Apply black matte shadow in waterline and under eyes
14. Apply light cream / pinky shade of shimmering eyeshadow near tear ducts on inner corner
15. Curl eyelashes
15. Apply mascara
16. Spritz setting spray and wave your skin dry for a few seconds

*Beware, this MAC eye pencil is very smudgy. I only use it when going for this look. As regular eyeliner it smears very easily and migrates, making for messy eyes!

The hair & makeup look


Lipstick 'kitty' // ModelCo

The accessories

These quilted slip-on sneakers are a perfect comfy, but cool addition to an outfit. They can dress down a chiffon dress, or cool up a leather jacket, they're great with anything!


Mug // Starbucks
Slip-ons // Steve Madden

What do you throw on when you're feeling lazy in the AM? What are your effortless look favorites and easy go-to makeup tricks? Comment below! <3

Xo

Monday, October 26, 2015

The ultimate guide to cozy

One of the best parts of fall is the wonderful excuse of being able 
to hide inside under a blanket with a cup of tea in your hands and a good movie on the tv. There's an excessive amount of things about fall that are just wonderful. Cookies, tea, chai, hot chocolate, all sorts of delicious seasonal snacks that if you aren't sick of by the end of fall season, you haven't had enough of them. Since one of my favorite things about fall is getting cozy, I thought I would write you guys a guide to fall coziness with a few of my newly discovered favorites and obsessions. 


So, here are the essentials for a cozy fall indoors...

1. Sisters Baking Co. Pumpkin Spice Crunch

I had to take a photo of this off the internet because I ate this bag so fast that I didn't have time to take a photo. I ate the bag while I watched True Story in bed, drank tea, and cuddled up to my cat. What a perfect fall night. The link on the website, here, is the best place for a little value pack, 3 for $24, most places in store are at least $6.99 per bag. This is the fall treat, and a healthy snack!


2. A homemade blanket

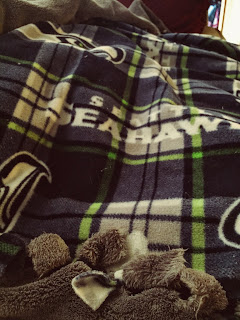
These DIY tie blankets are super easy, and if you feel around for the perfect fleece at the fabric store, you can make a really good, heavyweight winter blanket! I got my fabric online and ended up with an anti-pill plaid Seahawks fleece for the top patterned layer, and a cuddly fleece for a super soft, heavy bottom layer. There's something even more comforting about the blanket being homemade.


3. The perfect mug

While a cup of tea is warm and comforting, there's something even better about serving it up in a cute lil' mug. Handmade mugs are the best, Etsy is a great place to find them. ASOS always has cute and funny mugs, and Urban Outfitters is a great place to look for cool mugs for reasonable prices, and they are always having sales. Here is my favorite Madewell mug.


4. Fuzzy slippers

If your feet are warm, and your head is warm, everything else in between is good to go. So having a fuzzy pair of fall slippers is a closet essential. And I'm not talking about those weird socks with little sticky foot pads that make a slipper/sock mix, I'm talking hard bottom, fuzz lined, bedroom slippers. I got some at VS a few weeks ago and they're seriously amazing. The outside is pink cable knit, the inside in fuzzy cream fabric, and the bottom is structured like a shoe. Acorn (they carry this brand at REI) also makes some great slippers, they're just a little more pricey than I'd like. Here are my VS favorite slippers, mixed in with a couple of my other fall favorites!


5. Smell good candles

Fall smells is another fall plus. Pumpkin spice, apple pie, cashmere, cedar, pine, all those goodies. Jason and I love finding these candles whenever we go to Target at the beginning of fall and stocking up! If you're relaxing inside away from a cold, gloomy day, a smell good candle is the perfect treat.


6. Trader Joe's Speculoos Cookies

Shamefully, I also admit taking this photo from Google because I ate these cookies too fast. With a cup of chai or a cup of milk, these cookies are so good. They're light (which makes them totally dangerous), and not too sweet. Honestly, Trader Joe's has the best seasonal snacks for fall and winter, from pumpkin cookies to candy cane Joe Joe's when winter comes around. 

7. Yummy tea

This is probably more of a winter themed tea, but I love it all through fall and winter. My mom came across it and shared it with me a couple years ago, and every year she stocks up with like 10 boxes to last her through the year, hehe! It's the perfect balance of peppermint and green tea that isn't too sweet or strong.


Do you have any of these fall items around your house? What do you need for a perfect cozy fall night?

Xo

Saturday, October 24, 2015

A girl drowning in her sweater

My favorite kind of sweater? If they're meant to be fitted but I like the style or color, I reach for an XL. If they're labeled 'over-sized', I'll still reach for a M-L. I like the kind that I need to roll the sleeves up three times just so they fit at my wrists. I like the kind that I can't tuck in because there's so much fuzzy fabric everywhere. I like the kind that I can pull over my face if it's chilly out. I like the kind that I can roll my sleeves down once and use them like mittens to keep my hands warm too. I like all sweaters, but I love big, baggy, comfy, over-sized, shapeless sweaters. And my favorite way to wear this big, baggy sweater? With a dainty little skirt. This makes the big, shapeless, cozy, piece of fuzz have a hint of femininity. It's like the perfect balance of what you want to wear to bed in the winter, and what you want to wear out to a dinner dinner. Sounds weird, huh? Well, let me show you...

The outfit

Okay, if you need to go sweater shopping, H&M might be your place. It's where I've found almost all of my sweaters that aren't consignment because they are super reasonable, and most of them (the ones that aren't 100% itchy acrylic), are super soft and cozy. All my sweaters from H&M are really soft and comfortable, and I've found all of them for under $25. They have a huge selection too, so it won't be hard to find at least one you like. Forever 21 is a good place for cheap ones, but I really just don't like the quality of their stuff, in all honesty. If you want fancy, super soft, super nice sweaters, the place to go is Madewell, but you have to be willing to drop major money (check retailmenot.com for coupons and sales every once and awhile, that's where I do all my couponing).

I absolutely love the color of this sweater, it's like a super light mauve and it's amazing. Even though it's huge and shapeless, I feel like the color alone makes it girly, and adding a black chiffon skirt makes it even more so. I just slightly tucked the bottom of the sweater into the top of my skirt to give the sweater some more shape. I paired it with my Steve Madden Eleanorr flats in black suede (OBSESSED with these).


Sweater: H&M
Chiffon skirt: I made it / Alternative

The accessories

I added a gold watch, some crystal bangles, a black quilted clutch with gold accents, and it was a perfect, effortless fall look, but still super cozy! Perfect for going and getting a coffee out.


Watch: Nordstrom BP
Clutch: H&M / Alternative

The hair & makeup

As always, I put on black liquid liner, this time MAC fluidline instead of my normal Artistry automatic. I put the liner over MAC paint pot in stormy pink, to match my sweater. Lastly, I put on MAC lipstick in the shade plumful. It's a lustre finish, so it adds a little shimmer to the lips, and is really moisturizing. It's a perfect, natural fall shade, and it doesn't dry out your lips like matte finishes tend to. One downside of a lustre finish is that it won't last nearly as long.

For my hair, I took back the front section from each side of my head, and bobby pinned directly in the back center of my head. Bobby pins are the best because you can create shapes and patterns with them to make them look nice, like a bobby pin triangle, for a nicer, cleaner look. And, it's such an easy way to keep the hair out of your face!


Eyeliner: MAC Fluidline in Blacktrack
Eyeshadow: MAC Paint Pot in Stormy Pink
Lipstick: MAC lipstick in Plumful

How do you like to dress up cozy fall sweaters? What is your favorite type of fall sweater and your favorite place to find them?

Xoxo

Thursday, October 22, 2015

Get vampy with me

Hey, beautiful! As you know, I've been getting more and more into makeup recently, especially with all the fun looks to experiment with for fall. I'm also nowhere near a makeup artist. I'm a 15 minutes max in front of the mirror before I run out the door kinda girl. But, when I'm shooting photos for the blog, I'm always willing to spend more time having fun and experimenting with new products, new combinations, and new looks. I went to the MAC store in Uvill last week, and took up a guy's time with questions, shade testing, and makeup help for like an hour...I felt so bad for him. BUT, in the end, I got a bunch of great new stuff that I'm excited to share with you guys!

Honestly, I can't even put into words how much I love MAC. Their products never let me down, their service is always so personable, and they are always willing to help. They have awesome events and their employees are really great about explaining things when you need help, helping you find your perfect shades, and they are honest about their products too. I always find it refreshing when someone is willing to admit the products they really aren't a fan of, so you get the best stuff they have to offer. When I was there last week, I had him help me pick out a shade of blush that would compliment my complexion, a shade of bronzer for this fall, and a pressed powder that I could use for contouring. I also picked up setting spray, cream eyeshadow, my first real, fancy makeup brush, and...you know I didn't leave without a new shade of lipstick!

I'm finally learning the art of contouring and highlighting, but the dummies version - since I'm not going to buy a 15 pot contouring palette and get ready in the morning, then spend an hour washing it all off at the end of the night. My makeup routine even with this new stuff takes me about 10-15 minutes. Since I'm finally learning, I thought I would share my contouring for dummies knowledge in a vampy makeup tutorial! This one still only took me about 20 minutes with all the extra stuff I wouldn't do on a normal day. Here we go!

1. Start with a cleansed and moisturized face - always! You can use primer if you like, but that's a step I skip. If you like primer, I've heard that the Smashbox Photo Finish Primer is incredible.

2. Put on your liquid foundation whether it be BB cream, CC cream, actual liquid foundation, etc. I apply mine using a beautyblender.


3. Put corrector under your eyes. I'm using Bobbi Brown corrector in 'light bisque'. Honestly, I only got this because Essie Button (aka Estee Lalonde) swears by it and I'm kind of obsessed with her blog and youtube videos. And she's right, it makes a huge difference for those with dark undereyes (mine always look like death). I just apply with my finger, as close to my lash-line as possible, and using as little as possible so it doesn't get cakey under my eyes. Can you see the difference with the eye that has corrector? 

Note: Keep in mind that corrector is meant to brighten the undereyes and make them look lighter, it isn't to cover up zits or dark spots, that is what you'll use concealer for.


4. Once both under-eyes have corrector, use the beautyblender (or your tool of choice) to apply concealer under your eyes and on any zits or dark spots you wish to cover up.


5. Now that foundation, corrector, and concealer have been applied, I like to move onto my eyes so that my liquid makeup has a few minutes to dry. If you want your eyeliner and shadow to be precise, you can apply tape diagonally from the corner of your outer lids to the corner of your outer brow. I didn't have Scotch tape so I was stuck with masking tape, and yes, I know I look ridiculous. I was trying to make alien fingers with my hand but I realize now that I just look even more stupid...


6. Right now, I am in love with MAC Paint Pots. They have some great colors, the consistency is amazing, and your eyelids don't get oily like they do with mineral shadows sometimes. They are a little spendy, but the pots go a long way, you barely need any to cover your lid. The shade I used for this look is 'stormy pink'. It's a pink and purple toned silver shade that is great for fall! Just dip your finger right in, and apply directly to your lid. I apply and thin layer across my whole lid, and apply a second layer on the outside of my lid and in the crease.

Tip: You can also get neutral colors (groundwork and painterly are two good ones) to use as an eye primer. You can top these shades with mineral shadows so that they stay longer during the day.


7. Now that your shadow is applied, grab liquid liner! I am using MAC fluidline in 'blacktrack'. It is a gel-like consistency that you dip an angle brush in to apply. A really thin angle brush is essential if you are using liner with this kind of consistency. Mine isn't great, so I dampen mine and shape it before using so my line is more precise. Start on the outside of your lid at the tape, and work your way in.


8. Peel off the tape to reveal perfect liner, no makeup remover needed.


9. Now for the harder part (but come to find out, it's really not that hard). Below is a little guide of where to highlight and contour. White is for highlighting, and black is for contouring. The goal with contouring is to create shadows on your face, heighten your cheekbones, and give your face the illusion of structure where you don't have it. Once you're done, if you tilt your face, you should see the shadows and glistens of where you've created this illusion (like one of those hologram bookmarks you had as a kid). For all highlighting, contouring, and blushing, I use MAC brush 129. It is a tapered brush. All their brushes are made from real hairs, and they're super nice! I absolutely love mine.

Tip: Since contouring powder or cream is generally several shades darker than your skin tone, you want to make it look as natural as possible. The key to doing this is not having too much on your brush. Once you've lightly dipped in, hit the handle of your brush on your wrist, this will knock any excess powder off the brush tip, voila!


To contour my face, I use MAC pressed powder in 'dark plus'. I lightly apply this starting where my cheekbone meets the top of my ear, sweeping on the hollows of my cheekbone, then slightly upward at the end.  I also hit the top of my forehead, and the sides, blending into my hairline to make it look more natural. Under the jawline is another important place to create structure. Whatever is left on the brush, I use on the outsides of my nose, but I don't pick up any new powder for this part.

Tip: Since you are trying to heighten your cheekbones, make sure when sweeping powder that if anything, you are always sweeping powder up to your cheekbones, not down. You don't want an excess of dark powder awkwardly sitting by your nose!

To bronze my face, I hit the spots I have contoured, as well as a little bit more of my forehead, my neck, and my chest. Who doesn't love a little glitter? I use MAC bronzer in 'refined golden'. In the photo below (pressed powder on left, bronzer on right), you can see that the pressed powder is matte while the bronzer has little specs of shimmer.

Tip: When applying bronzer, think of places that during the summer, would get sun-kissed. This will look the most natural. Don't over-apply, you don't want to look like you got a bad tan!


To highlight my face (I don't actually have highlighter), I use a liguid highlighting pen for large areas like my forehead, creating the shape you'd imagine a sun's horizon to have (a half circle starting between your eyebrows, and rays working diagonally upwards and outwards). I use a matte white eyeshadow under my brows, and a shimmering white / cream colored shadow for the top of my cheekbones above my contour, as well as my cupid's bow (tip of the mouth), and under my lip. 

10. After highlighting and contouring, apply blush. I recently realized how much I used to over-apply blush, and how less is more. MAC artists help me choose a light pink shade that was subtle, shimmery, and good for my skin tone. It is mineral blush in shade 'dainty'. Since highlighting and contouring has already created a bronzed look on your cheekbones, you just need to apply blush lightly to the apples of your cheeks to give yourself a natural, pinky, glow.


11. For a fun, fall look, I decided to apply false lashes. I've had these for awhile and honestly had no idea what the heck to do with them. If you don't know how to apply lashes and need some extra help (like I did), here is the tutorial that helped me the most. I have Urban Decay Perversion lashes 'Bait' because they were the same price as all other lashes, but they included the glue! You'll need some tweezers, the lashes, lash glue, and lots of hand steadiness.


Tip: Apply glue from the outside of the lashes inward, holding the center of the lashes with your tweezers. Let the glue get tacky for about 15 seconds by waving them in the air. You'll see the glue change a purpley-blue tint, this means they are ready!


Application: Press the lashes onto the center of your lid as close to the lash line as possible first, and work outward from there, using the tweezers (or your fingers if this is more comfortable), to press these firmly onto your skin. Careful not to get the glue stuck to your real lashes, because the glue is strong and you'll probably pull out your lashes, and trust me, it does not feel good. The glue will dry clear, but fix any imperfections by covering with liquid liner. Some people like to use mascara to connect real lashes with the fake ones, I chose not to do this so that I can reuse my fake ones, and it looked just fine.


12. For this look, I wanted really dark, vampy, fall lips. I lined my lips with MAC lip liner in 'Nightmoth' (MAC lip liner is out of this world amazing), and MAC lipstick shade 'Sin'. 

Tip: When applying liner, try and create a natural shape at your cupid's bow. Apply your lipstick after lining your lips, and fill in spots you wish with more lip liner after!


13. Last step, guys! If you want your makeup to set, stay longer, and appear more luminous and natural, I suggest using setting powder or setting spray. I really love this setting spray from MAC. It's not super expensive, it'll go a long way, and just one spritz does the trick. It has a little bit of a cooling effect, and it smells lovely! I close my eyes, and spray once about a foot away from my face. I fan my face for about 5 seconds, and I'm good to go for the rest of the day. I've heard the Urban Decay all-nighter setting spray is really great too.


The finished look

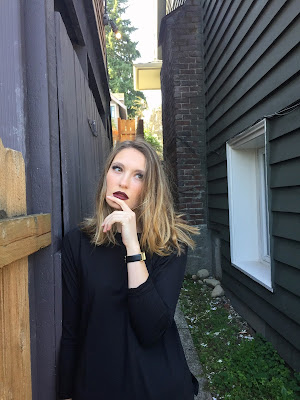
Wearing some colors can bring out different shades in your makeup (ie. a red shirt may bring out more red tones in my lipstick, or wearing purple might bring out more purple tones in my eyeshadow), so I went all black for this one.


The products

Mary Kay medium-coverage foundation in beige 300
Bobbi Brown corrector in light bisque
Mary Kay concealer in beige 1
Beautyblender the original beautyblender
MAC paint pot in stormy pink
MAC fluidline in blacktrack
Urban Decay perversion lashes in bait
MAC 129 brush
MAC pressed powder in dark plus
MAC bronzer in refined golden
Coastal Scents revealed 2 palette
MAC mineral blush in dainty
MAC lip liner in nightmoth
MAC lipstick in sin

The highlights and contours

Here is a little video so you guys can see the true effect that contouring and highlighting had on my face when I was done, because you can really see the shadows it created on my cheekbones and under my jawline.


I hope you guys found this tutorial helpful and enjoyable! I would love your feedback, if you want to see more makeup tutorials, or not.

What are your fall makeup favorites? Do you have a favorite makeup brand? It's clear what mine is ;)

Xoxo